Pressed flowers help us to save a little piece of spring/summer to enjoy all year round.
I have always been in awe of pressed flower art. You get the best effects when you do this on a double glass frame. I didn’t have one on hand, so I made a DIY white frame from a poster board.
Here is a step by step of our DIY:
Material needed:
- Box cutter
- Poster board
- Contact paper
- Scissors
- Pressed flowers
- Cut out your desired frame size from the poster board using a box cutter. I used a magazine as my size guide, drew an outline with it and cut it out into a frame.
- Draw a rough outline of butterfly on the non-sticky side of the contact paper.
- Cut out the same size contact paper as the frame. (Be sure to leave some extra hanging out, which you can cut at the end).
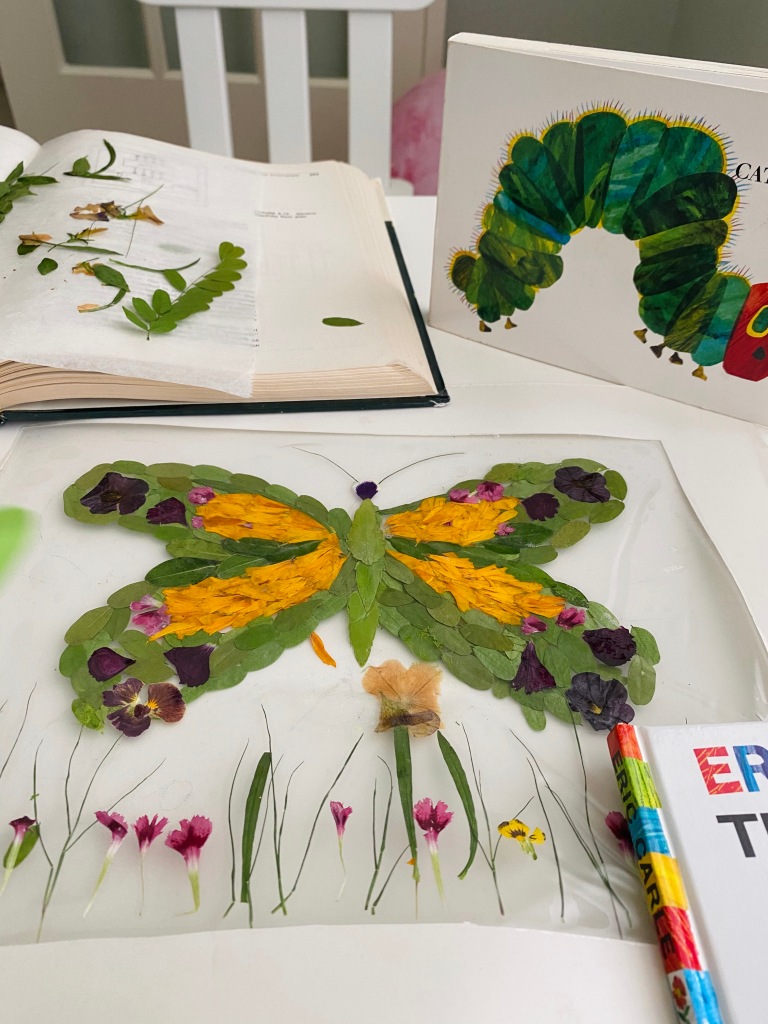
- Start placing flowers and leaves (facing down) in the outline
- Once you are done pasting all the items. Place another contact sheet on the exposed side slowly. Press it together without getting too many air bubbles (you may need help with another pair of hands here)
- Attach command strips and its ready to hang as a decor.
Option 2:
You can do the same procedure on a glass frame. Remove the cardboard backing on the frame and add a second glass as a covering to get the double glass effect. This is how it would look.

Pressed flower techniques
There are several ways to get pressed flowers for your project:
- Book press
This old school way is in my opinion the best way to save the flower colors and get the best dried flowers. But the down side is, it will take 3-4 weeks to dry completely. Be sure to place the flowers/leaves in a parchment paper to avoid staining book pages - Microwave method
Place the flowers/leaf in a paper towel. Place it in microwave with a baking dish or something heavy that’s microwave safe on top. Now heat for 15-20 seconds.
Replace the paper towel and repeat if its larger flowers until it comes out dry. ( Using this faster method makes the flowers more fragile and easy to powder)
- You can also press the flowers in book for few days then microwave for 10-15 seconds to expedite the drying process
3. Iron box method
Similar to microwave method, place the flowers inside a paper towel then place a clothing piece over it and place iron for 10-15 seconds several times until the flowers are dry.
- Pressing machine
If you like fancy gadgets, there are actually pressing machines available that makes this job easy for craft projects.
Pick and choose the method that works for you. Also keep these few tips in mind while working with pressed flowers.
- Make sure to use flowers that are fresh and at the peak of their bloom.
- Put the flowers inside the book right away after they are plucked before they start to wilt
- Place the flowers face down inside a parchment paper for pressing
- Do not collect flowers when they are wet. It can cause mold.
- If you are using wildflowers, be sure the flowers you are collecting are not poisonous or endangered
- Flowers with flatter leaves are the easiest to press. Ex: Violas, cosmos
- Do not overlap the flowers while pressing
- Thick flowers will take longer to press and dry. Try adding additional heavier books to speed up the process a little
- Colors of the flowers will change once they are dried. Experiment with different colors, textures and sizes to get the best looking ones for your project.
Happy Pressing :). Do share your projects with me on instagram .
